Wednesday, October 17, 2018

Luchi with Kumro Alur Chorchori

Hi Friends,
First of all, happy Durga Puja to everyone.  Being a Bong, it is very difficult to maintain a low calorie diet during the time of festivity. And for the one, which I will be discussing today, don’t even dare to think about diet food. One of the must have for a Bengali in any occasions is the luchi, not puri. This is an insanely delicious deep fried flat bread made of all purpose flour which makes any one crazy. I should warn you that they can vanish in no time. So make plenty. There are many sides that can easily pair with luchis like alur dom, alur chorchori, begun vaja, kosha mangsho, payesh, suji etc. That being said these luchis become an intregal part of traditional Bengali brunch. Today, I will show and share my tips and tricks to make perfect puff up fulko luchi. I will also share a easy side dish that goes very well with the luchis. I can go talking about luchis all day. But for now lets start making them.
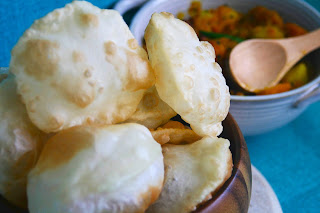
Luchi with Kumro Alur Chorchori


Yeilds 3 serving

Luchi

Ingredients

1. 2 cups all purpose flour (maida)
2. Salt according to taste (around  1/2 tsp)
3. Sugar according to taste (around 1/2 tsp)
4. 2 tbsp of white (canola/ vegetable) oil + white oil for frying
5. Water to make the dough (around 1/2 cup)

Methods

Making the dough and the luchi
1. In a mixing bowl add the flour, salt and sugar. Mix it with clean hands.
2. Pour the oil and mix it again till it forms like coarse crumbs.
3. Add little water at a time and mix it till they come together. Don’t pour all the water at one time. Knead the dough till it forms a smooth ball. Keep it covered with a clean towel. Let it rest for 10 to 15 minutes.
4. Divide the dough into number to small balls ( size around 2 cm diameter ). Roll these small dough pieces into smooth balls
5. Grease the rolling pin and the rolling surface area with oil.
6. Take a ball of dough and flatten it. Roll the dough into a circular disc of dough ( size around 5 cm). Note: While rolling, try to put all the pressure from your body or hunch. That pressure will help to have perfect smooth disc of dough.
7. Using the previous step, make all the dough disc shaped luchis.
Rolling the dough balls

Round luchi is ready to be fried

Frying the Luchi

1. Heat some oil in a pan in medium high to high heat. Take a small piece (pinch) of dough and drop it on the oil. If the dough rise up instantly, then oil is ready and hot enough for frying. If it drops down, then wait for the oil to heat up.
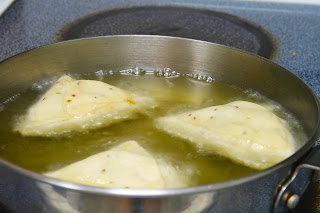
2. Add one luchi dough disc into the oil. It would start to puff up. Gently splash some oil on the top surface. And give a gentle push on the dough. These will help to puff up fully into a luchi. Then give one quick flip and fry the other side. Take the puff up luchi from the oil into a paper lined container to drain excess oil. This way fry all the luchis.
Note: Fry one luchi at a time. Don’t gather all the dough disc in the pool of oil.
Take them out after one flip and don't over fry them. They should come out white. But some people likes it little brown. For them, fry them few more seconds.
 Puffed up luchi is ready for flipping
Puffed up luchi is ready for flipping

Frying the other side

Luchis are ready
Luchis are ready


Since luchis are ready, lets make the simple and easy curry that goes with it.

Kumro alur chorchori (Pumpkin and potato medley)

Ingredients

1. 2 cups of small cubes of butternut squash or pumpkin ( kumro) (Note: I have used butternut squash and they tastes better)
2. 2 cups of small cubes of potatoes ( without skin. so peel the potatoes)
3. 3 green chilies with slits in between
4. 1/2 tsp of kalonji ( nigella seeds)
5. 1/4 tsp of turmeric powder
6. 2 tbsp of mustard oil
7. Salt according to taste
8. Sugar according to taste
Ingridients for Chorchori

Methods

1. Heat the mustard oil in a pan. Add the kalonji and let them splatter. Add the green chilies.
2. Add the potato cubes and pumpkin cubes. Fry them for 3 minutes.
3. Sprinkle salt, sugar and turmeric powder. Stir them to give good mix. Now cover the pan and cook it for another 3 minutes.
4. Uncover the lid and check the potatoes are tender. Add water and cook it in medium flame for another 4 minutes with lid covered.
5. Open the lid and check the veggies are soft enough. Otherwise cook for another few minutes. Check the salt and sugar. Adjust accordingly. And your chorchori for luchi is done.
Chorchori is ready
Chorchori is ready


You have noticed that how simple is to prepare these items in a brunch. Grab some luchi and bowl ful of curry. Drowse the pieces of luchi in the curry and enjoy the heavenly taste in your mouth. So, make this insanely delicious pair in your next brunch party for the festive season. Please comment your suggestions and your inputs, which will help me to improve this blog. Enjoy this Bengali delicacy with friends and families. Let food spread the light of festivity in your kitchen.

Thanks,
Moumita


Tuesday, October 16, 2018

Singara

Hi Guys,

Yes, today’s topic is Singara. It is also known as samosa. Singara or Samosa is one of those items that are present in almost all the food cultures. And the concept is widely available in broad geographical regions, from Middle east to great east China. It was one of the ancient foods introduced by Middle east. Originally, it was a fried snack made with meat and wrapped by a pie dough. The Mexican Empanadas seems similar to Singara or Samosa. As this concept of appetizer has travelled a lot with time, alternations appeared according to the taste and food habitats of different regions. But, today no more wandering, as today is the time to visit my homelands' fulkofir (cauliflower) Singara. If I mention the Singara, a cup of hot tea automatically comes in my mind as they complement each other. And the deadly pair can intensify any Bong adda (gossip). If I am taking about Singara, then how can I forget to mention the adda. Bong adda means where the family or friends of similar or different generations gather and gossip about almost everything, be it movie, sports or even politics. The Singara works as a source of energy in the adda. The Bong Singara is unique in its filling and becomes quite different from usual Samosa. Samosa has the filling made of potato curry but Singara is made of a curry out of cauliflower, potatoes and many other jewels like peanuts and raisins hidden in a crust that has nice crunch. My mouth is already watered just by describing it. And lets start now.
Veggie Singara
Singara

Singara with tea
Singara with tea


Recipe yields 8 servings

Cauliflower potato filling

Ingredients

1. 1 cup of small pieces of cauliflower florets
2. 1 cup of small cubes of potatoes
3. 1/3 cup of blanched green peas
4. 1/4 cup of fried peanuts (whole with the shell)
5. 1/2 tbsp of ginger
6. 1 tsp of cumin seeds
7. 1/2 tbsp of Bengali bhaja masala
8. 1/8 tsp or pinch of Bengali Garam Masala (you can find the recipe in my blog)
9. 1 tbsp of mustard oil
10. 1 bay leaf
11. 1/2 tsp cumin powder
12. 1/4 tsp turmeric powder
13. Salt according to taste
14. Sugar according to taste (This filling is little sweeter on side and you may need little more)
15. Water
Ingredients for the filling

Methods

1. Take a shallow pan and heat it. Add mustard oil. When the oil is hot add the cumin seeds and then bay leaves. When they splatter add the cauliflower florets, potatoes and fry them for a minute. Sprinkle some salt and give a good mix. Let them cook for 5 minutes with lid cover. Stir two or three times in the meantime so that they don’t get burn.  By this time they should be soft. So uncover the lid and check.
2. When the veggies are soft enough add the blanched green peas and ginger paste. Give a good stir to mix them. Add the cumin powder and turmeric powder and mix again. You may need to add some water to avoid the spices of getting burnt. The filling should be dry not runny so while adding water be shy on it. Cook it for another 4 minutes with lid covered and few stirs in between.
3. Uncover the lid and taste it. Adjust the salt and sugar accordingly. Now add the raisins, fried peanuts, garam masala powder and bhaja masala. Give a good stir to mix them nicely and cook for another 2 minutes. Discard the bay leaf as it has done its job. Now the filling should be ready.
Cauliflower potato curry filling
Filling

The dough

Ingredients

1. 2 cups of all purpose flour
2. 3.5 tbsp of white oil
3. 1/3 tsp of ajwan (carom seeds)
4. Salt according to taste
5. Sugar according to taste
6. water (around 1/2 cup)

Methods

1. In a mixing bowl pour the flour, carom seeds, salt and sugar. Use your clean hands to give a good mix. Now add the oil in the flour. And mix it till it resembles like coarse crumbs .
(Note: The carom seeds will bring surprising crunch in your mouth when you have a bite of the fried dough.)
2. At this stage add the water little around 1 tbsp and mix it. Alway add water in little amount and give a good mix. Don't pour all the water at one time. Knead the dough, it forms a smooth ball. If you need more water add it in little amounts.
3. Cover it with a clean towel and allow it to rest for 10 to 15 minutes. Always remember a well-rested dough always gives best results.
4. Now make equal four portions of the dough. Shape them into four smooth balls. Keep them aside covered.

Shaping and filling the Singara

Ingredients

1. 1 tbsp of oil for rolling
2. 1/4 cup of water for smearing the edges

Methods

1. Take some oil and grease the rolling pin and the surface where you will roll.
2. Now place one ball of dough on the surface and flatten it a little. With a rolling pin try to roll into a circle or disc shape out of it around 15 cm of diameter.
3. Cut the circle into two semi circles. Smear some water on the flat edge of the semi circle. Join the edges to form a come. And then try to seal them nicely by pressing with hands.
4. Fill the cone with the cauliflower potato filling.
5. Now again smear the curved edge of the dough with some water. And bring them together to close the Singara by joining the other ends. Nicely seal the closed edges. Now, the shape should be like a triangle. Repeat the previous steps to form rest of the Singara. The Singara is ready for frying.

Note: You can make the Singaras and store them in fridge for 3-4 days in a closed container. When you want take them out and let them come to room temperature. And then fry them.
The dough balls
The dough balls

Dough is rolled into a circle

Divide the dough circle into two

Smear water in the flat edges

Seal the join
Seal the join

you get the cone
you get the cone

Fill the cone
Fill the cone

Seal the edges to close it

Singara is ready for frying

Singaras are waiting to be fried

Frying

Ingredients

1. oil for frying

Methods

1.Pour some oil in a pan (which have some depth). Heat the oil in medium high heat.
2. When the oil is hot, add the Singara in the oil. And turn the heat to medium.
(Note: Don't overcrowd the pan with Singara. Fry few at a time)
3. Fry them low and slow. The heat should be medium level or low medium. Otherwise the outer sides of dough will get burnt and still you will have uncooked dough. When they turn golden brown take them out in a plate lined with paper towel to drain excess oil. And they are ready to be served.
Fry the Singara
Fry the Singara

Singaras are served in a thonga (paper bag)

Served
Served


Serve these Singaras with ketch up or mint coriander chutney or tamarind chutney. But the most important add on is a hot cup of milk tea. The hot tea and a bite of Singara will take you to the heaven. The marriage of these two dish have produced a huge number of discussions, conversations, planning and brainstormings. In an occasion you can serve them as a appetizer and they would become instant hit. So, prepare these popular snacks and enjoy with your friends and family during the time of festival. Let this year's Navratri and Durga Puja get delighted with the home made foods from your kitchen. Happy Durga Puja to everyone from my kitchen to yours.

Thanks,
Moumita


Friday, October 12, 2018

Nolen Gurer Sandesh

Hi Friends,

Hope you guys are doing well. Today I will share something, which always cheers me up when I am down. I believe it will do the same trick to you as well if you try. As a typical Bong, I was raised with all the renowned sweets of Bengal. Sometimes, I feel fortunate that I was born as a bong. Otherwise, I may not discover the indulgence of sweet. I love all kinds of desserts, but those, which are from Bengal, will always steal my heart away. Sandesh comes in different forms, shapes, and colors. They have different processes to prepare. They are widely available in the sweet shops all over India. During the winter season there is a special kind, called Nolen Gurer Sandesh. Nolen Gur is actually molasses made from date. The Sandesh were known as pranahara, which mean heart stellar. I can understand why they gave such a name. Nolen Gurer Sandesh is a must at the end of any meal during the winter season of Bengal. The smoky flavor of date molasses gives a signature flavor to the Sandesh, which you would crave for when winter comes. The molasses are concentrated and available as Patali (cake shaped form). I know the next question is how can you get these?  During winter, these are available in the temporary street side stores or the grocery stores in Bengal. In United states, I can find these jewels in the frozen section of Bangladeshi store and the best part is these are available all year around in the Bangladeshi stores. So, next time you are visiting a Bangladeshi store grab one Patali. And these Patalis can be stored in your freezer. Now, I should mention another easy hack for the preparation of this recipe. And that is full cream ricotta. If you can’t find ricotta, make your own Chhena or cottage cheese. But if ricotta is available in your place, take the help.
Nolen Gurer Sandesh
Nolen Gurer Sandesh

Nolen gurer sandesh ready for Durga Puja

Recipe yields 12-14 pieces

Ingredients

1. 1 pound (15 Oz) whole milk Ricotta cheese or Chhena*
2. 2/3 cup of crushed powdered date molasses/jaggery ( khejur ghurer patali)
3. 1/8 tsp of cardamom powder
4. 1/2 tsp of kewra essence water
5. Chopped pistachios for garnish
6. Chopped almond slices for garnish
7. Few small golden raisins for garnish
8. 1/4 tsp of ghee
Only few ingredients but they are powerful

Methods

1. In a shallow pan, add the Ricotta or Chhena. Start the heat at medium or medium high. Cook it till it forms like liquid. It will take around 2 to 3 minutes. But don’t go anywhere where. Stir it frequently. You should keep an eye on this or it may get burnt.

2. Add the molasses powder/jaggery powder into the pan. Mix it nicely and stir frequently. Cook this till it leaves the sides of the pan and starts forming like dense dough. It will take around 18-20 minutes. You can add the kewra essence and cardamom powder. Then give a good stir and cook for 2 more minutes.
Note:
You can always add more molasses according to your taste.
Please don’t try to multitask during this time. Because you need to stir repeatedly so that mixture is smooth. After 20-22 minutes of stir, you can stop the heat. Then you will have norom paker sandesh (soft version of sandesh). But if the cooking time increases to 25-27 minutes, then more water will escape and you can get the korapaker sandesh (hard version of sandesh).
3. Now comes the part of shaping or moulds. And you can be creative in this part. Fortunately I own some moulds. And I should be thankful to didu (Grandma-in-law) for these wooden moulds. There are many shapes and styles.
Stirring the ingredients

Ready for the moulds

Enjoy the petite Nolen gurer Sandesh

Option 1.
So if you have moulds, then flaunt these beauties. Grease the moulds with some ghee and place small portion of the ricotta mixture dough (around 1.5 tbsp) on the carving side. And keep it for a minute then take these decorative sandesh out of the mold. And garnish with some raisins, chopped pistachios and almond pieces.

Option 2.
If you have a square cake pan, grease that with ghee. Pour the ricotta mixture. Smooth out the top layer. Sprinkle the chopped pistachios and almond pieces. And then you can cut squares of sandesh. Or you can use a small cookie cutter (heart stape) and cut some shapes of sandesh out.

Option 3.
Grease your clean hands with ghee. Take a small portion (1.5 tbsp) of ricotta mixture. Make a smooth ball out of it. Now flatten the top end with your palm. With a clean toothpick draw some lines or curved to give the impressions of moulds. Don’t go overboard and keep it simple. Decorate with sprinkle of nuts and a piece of raisin.

Preparation of Chhena*

Now to make Chhena you need 1/2 gallon you of whole milk and 3 tbsp of vinegar.
Start heating the milk in large pan on medium heat and stirring meanwhile. Heat the milk till it comes to a boil. At this point pour the vinegar. And heat for another 2 minutes. You can easily observe that milk curdles and Chhena is appearing out of the water. When there is no more visibility of milk, stop the heat. Now strain the Chhena through a cheese cloth. Wash the Chhena in the cheese cloth with cold  water 2 to 3 times. It will help to remove the strong smell of vinegar.  Keep the Chhena in the cheese cloth by hanging it in a height so that remaining water can drip over. I hang it from the tap of my kitchen basin by tying a knot with the cheese cloth and the head of the tap. I place bowl below to catch the dripping. It can also catch the Chhena if it accidentally drops over.


I have shared all the tips and tricks which I use often. Sandesh is a quick dessert to complete any Indian meal. The best part is it can be stored for 3 to 4 days in a fridge. You can always make ahead and enjoy these fruits of your labor later. Since, Durga Puja, Navratri, Diwali and many festivals are incomplete without the sweets. Why not make these ahead and share with your friends later. If you have any doubts about this recipe, please don’t hesitate to comment. I will be happy to help you. If you are making these, I would love to see how you have decorated. Don’t forget to post the pictures of your sandesh in our Facebook page. Have fun and lets make these celebrations happy.
Thanks,
Moumita


Monday, October 8, 2018

Chow Mein Kolkata style


Hi Friends,

I somehow feel happy during this time as a bong. Though I missed a lot as I am away from Kolkata. Can you believe I have missed 10 years of Kolkata Durga Puja. But food is a source, through which I can connect with Durga Puja even if being away from West Bengal. I try to incorporate the taste in my daily food for each of these five days of festivities. And I don’t feel any guilty. After the festival, I can work on my diet menu. But now its the time to rejoice, gather around the table and enjoy the cuisine of Kolkata with lots of adda (chatting/ gossips).
Anyway, coming to today’s recipe. Just like China town exists in every city around the world, there is also variety of recipes for Chow Mein. The taste of the typical chow mein, I have grown up with is the Kolkata style. The childhood and youth craving haven’t blurred yet. They seem to be a part of my menu during the festival. The taste reminds me of pandal hopping and devouring this with the friends. The Kolkata style chow mein tastes quite different from the traditional lo mein or Chow mein.
Chow mein Kolkata Style


Recipe yields 2 servings

Ingredients

1. 2 cake/portion of Ching’s egg noodle/veg noodle. These noodles have perfect thickness and it tastes better
2. 1/2 cup chopped medium strips of carrots (Carrots Julianne)
3. 1/2 cup chopped pieces of beans (Cut the ends of the beans and cut 1/2 inch strips by slicing them along the bias)
4. 3/4 cup cabbage strips
5. 2 green chilies chopped into small pieces
6. 4 big fat cloves of garlic chopped into small pieces
7. Slices of one onion
8. 1/2 green bell pepper chopped into thin slices
9. 1/2 red bell pepper chopped into thin slices
10. 1.5 tbsp soya sauce ( Ching’s dark soya sauce)
11. 1.5 tbsp chili sauce ( Ching’s chili sauce)
12. 1/2 tbsp vinegar
13. 1/2 tsp freashly crushed black pepper
14. 1/8 tsp Ajinomoto (MSG used as flavor enhanced. Usage of little amount is recommended. )
15. Salt to according to your taste
16. 1 tsp sugar
17. 4 tbsp butter (unsalted)
18. 3 tbsp Oil + 1 tsp of oil to fry eggs
19. 2 green scallions cut into small pieces for garnish
20. Water
Noodles with Veggies

Ingredients
Ingredients

Method

1. Boiling the noodles - In a large saucepan add 3 cups of water and sprinkle 1/2 tbsp of salt. Start the heat. Let the water comes to a boil. Now break the noodle cakes a little not finely (It will help to cook quickly). Add the broken noodles parts into the hot water. It will take 5 to 7 minutes to cook the noodles. In the meantime stir it with a fork and try to detangle some of the noodles. The noodle should be aldente (to the tooth), springy, and not mushy at all. Now strain the water from noodles by a colander. After all the water is removed place the noodles in a plate. Pour 1 tbsp of oil and coat the noodles well. Let them rest.
2. Frying the eggs - In a skillet or wok heat 1 tsp of oil. In a bowl, crack the eggs and add a pinch of salt. Then beat them nicely with fork. Then pour the egg mixture in the hot skillet or wok. Fry it for 2 minutes and break the egg omelet into small pieces (or scramble them). Keep the fried egg pieces ready.
3.Heat some (2 tbsp ) oil in a wok. Add 2 tbsp of butter and heat it till it is molten. Now turn the heat to medium high. Add all the vegetables and fry it for 2 minutes. Stir in between. Add the garlic, chili pieces and salt accordingly (Note: keep low on salt since soya sauce will be added and can make it more salty). Fry for another 2 to 3 minutes and then add the boiled noodles. (Note: Don't overcook the vegetables. They should retain their texture and crunch.) Stir it nicely. Add the soya sauce, green chili sauce, Ajinomoto, crushed black pepper, sugar and vinegar into the mixture. Mix them nicely so that all the noodles and vegetables are coated with the sauces. Fry them for another 3 to 4 minutes with good stirs. Stop the heat and add the remaining 2 tbsp of butter. Try to toss the mixture by flipping the wok ( may be 2 to 3 times). Add the fried egg piece or scrambled eggs and give good mix. Sprinkle the pieces of scallions on top. Now the chow mein is ready to be served.
Chow mein ready to be served

Enjoy with a Chopstick or fork


You can have this chow mein as it is with some cucumber salads or chili chicken or chicken Manchurian. I prefer chili chicken with this chow mein. Saying that, I realized I have to share Kolkata style chili chicken now. This chow mein needs some preparations and lot of chopping of vegetables. Once your preparation is done then it is a piece of cake. You have to cook everything fast in high heat. This way the vegetables will keep the crunch and you will have perfectly cooked chow mein. Only few sauces are used here. But once you grab a bite you can feel explosions of flavors in your mouth. Prepare this and enjoy it with your family. I will be very happy if you prepare and give a photo in our Facebook page. And most importantly enjoy the festive season with happiness.

Thanks,
Moumita

Thursday, October 4, 2018

Ilish Bhapa (steamed Hilsa)


Hi Guys,

How are you? Today, I am sharing the recipe of Ilish Bhapa (Steamed Hilsa). For any Bengali, this fish does not require any introduction. For those who haven't heard or tasted this dish or fish, I should spend some words. This is a simple and quick recipe with Hilsa fish. Hilsa is available in West Bengal and Bangladesh region during the rainy season. Though I stay away from there, I am fortunate enough to be able to enjoy Hilsa year around. The fish is available in most of the Bangladeshi store in the United States in the frozen state. It would be completely okay if you thaw them and trust me, the taste will be no less than the fresh ones. If you can't find Hilsa, you can use Salmon instead. Now speaking about the unique mustard sauce, it has a pungent flavor that complements the fish well. The green chilies bring some extra heat, which is necessary to break the richness of the fish. And the final drizzle of the mustard oil shines like a diamond in the crown.
Ilish Bhapa (Steamed Hilsa) with rice


Recipe yields 2 servings

Ingredients


1. 2 pieces of Ilish/Hilsa ( Remove the eggs from the pieces. As the steaming would not cook it thoroughly, fry them separately and enjoy with the rice)
2. 2 tbsp of mustard oil + 1 tsp of mustard oil at the end
3. 4 chilies with split ends
4. Salt + 1/4 tsp of salt to coat the fish
5. Sugar
6. 3 tbsp of mustard poppy seed paste (see below for the preparation)
7. 1/4 tsp of turmeric powder
8. 2 tbsp yogurt
9. 2 tbsp water
Ingredients for Ilish Bhapa

Methods

1. Take two clean pieces of the Ilish/Hilsa. The scales should be cleaned properly. I would prefer the pieces from the belly portion. Remove the eggs.

2. Sprinkle 1/4 tsp of salt and mix them well.

3. In a mixing bowl add all the ingredients except fish, chilies and 1 tsp of mustard oil. Mix the ingredients by stirring with a spoon. Taste the salt and sugar. Then add according to your taste. Now add the fish and slather the mixture all over the surfaces of fish. Let the fish marinate for 10 to 20 minutes.

4. In the meanwhile take a skillet or shallow pan, which has a lid to put on. You would need a small steel tiffin box which can perfectly fit the fish inside( steel container with a tight lid). I would recommend checking that the container can fit in the skillet and the lid if the skillet can cover it nicely. If you are satisfied with the skillet and the steel container then only go ahead. A lot of engineering, huh. It's not a rocket science. We can all design such contraptions from kitchen tools available. Now add some water to the skillet. The water level should touch half marking for the container height. Then place the skillet with water on the stove. Start heating the water on medium heat. It should not be boiling.

5. In that container add the fish and the marinade. If the mixture is too thick add 1 more tbsp of water. It should not be too runny or too thick. Add the split chilies on the fish. Now put the lid on.

6. Place the container over the water in the skillet. And cook it for 20 minutes with the lid on in the skillet. After 20 minutes stop the heat. Remove the lid from the skillet. Let the container cool. With the help of mittens take the container out of the water. Remove the lid from the container. Please smell it now. It will fulfill your soul. Finally, drizzle the 1 tsp of mustard oil over the fish and enjoy with hot basmati rice.
Fish with all the ingredients in a steel container

Steaming equipments ( steel container in a shallow pan with water)

With lid on
With lid on

After steaming
After steaming

Ilish Bhapa is ready

Mustard poppy seed paste

Mustard Poppy seed paste with yogurt and drizzle of mustard oil

Ingredients

1. 1.5 tbsp of yellow mustard seed
2. 1/2 tbsp of black mustard seed
3. 1/2 tbsp poppy seeds
4. 3 tbsp water
5. 2 green chilies chopped into medium pieces

Methods

1. Soak the yellow mustard seeds, black mustard seeds, and poppy seeds in a bowl with little water around 1/2 cup for at least 30 minutes.

2. After 30 minutes seeds should pulp up. Strain the seeds in a tea strainer. In a blender add the seeds and the green chili pieces. Blend it till it becomes a smooth paste.

You can use this paste in any way. I will share some more recipes using this wonderful concoction.


I will be very happy if you try this recipe. Get the best Hilsa from the store and enjoy this quick dish with your family. This comfort soul food with hot steamed basmati rice is a perfect bliss for any weekend lunches. Once you taste it, then there will be no way of going back. Comment down your thoughts and any questions regarding the preparation. I will be happy to answer those.
Don't forget to like our Facebook page and follow us in the Instagram.

Thanks,

Moumita